 how-to
Why Window Tint Bubbles Form: A Complete Guide
Table of Contents
- Why Window Tint Bubbles Form
- Window Tint Curing Time and Environmental Factors
- How to Remove Air Bubbles from Car Tint
- Signs of Low-Quality Window Tint Film
- Is It Normal to Have Bubbles After Installation
- Preventing Bubbles: Installation Best Practices
- Conclusion
Last Updated: August 25, 2026
Why Window Tint Bubbles Form
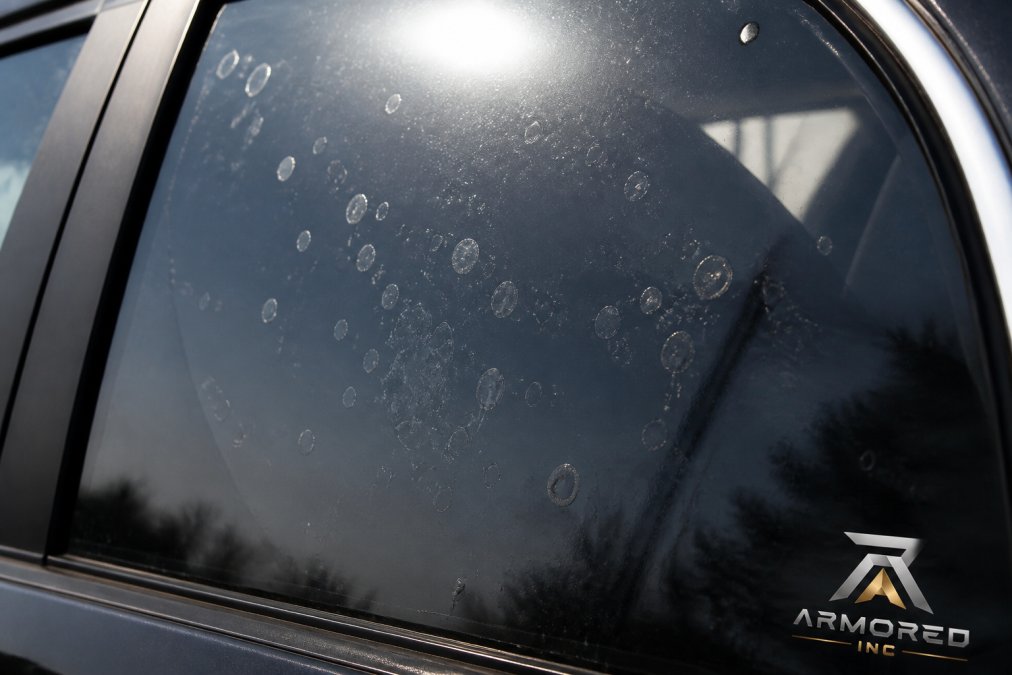
Window tint bubbles form when air or moisture becomes trapped between the film and glass during installation or curing. This is one of the most common complaints after professional tinting, yet it's largely preventable with proper technique and understanding of the curing process.
Bubbles don't always indicate poor workmanship. Some are normal during film settling, while others signal installation errors or material issues requiring correction. The good news: most cases fall into predictable categories with clear solutions.
The Curing Process and Moisture Evaporation
During installation, a thin water-based solution sits between the film and glass. This allows precise positioning before permanent bonding. As the film cures, moisture evaporates through the edges and from beneath the film.
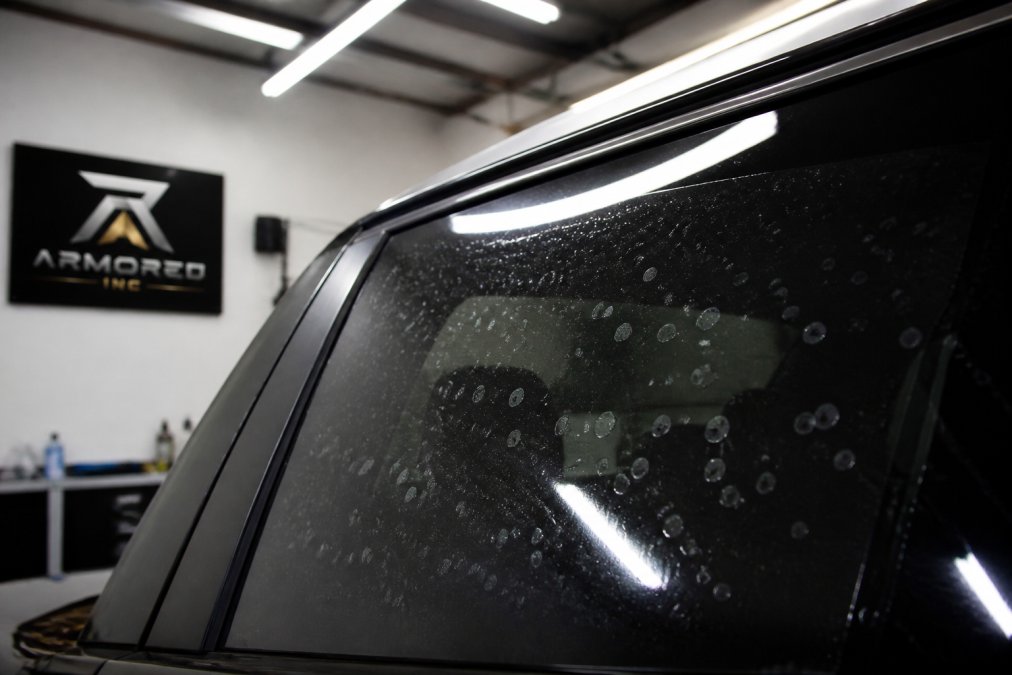
Micro-bubbles are normal during the first few days after installation and typically disappear within 2-4 weeks as the adhesive sets and moisture escapes (peer-reviewed research). The curing process is affected by temperature, humidity, and sunlight exposure. In cooler conditions, evaporation happens more slowly, extending the timeline. In humid environments, the process takes even longer. Ontario's winter conditions can significantly extend curing time compared to warmer seasons.
Solvent-based adhesives require more time for complete curing as the solvent fully evaporates, while pressure-sensitive adhesives set faster but may show more initial micro-bubbles.
Poor Installation Techniques and Trapped Air
Not all bubbles disappear on their own. Some indicate installation errors that won't resolve without intervention.
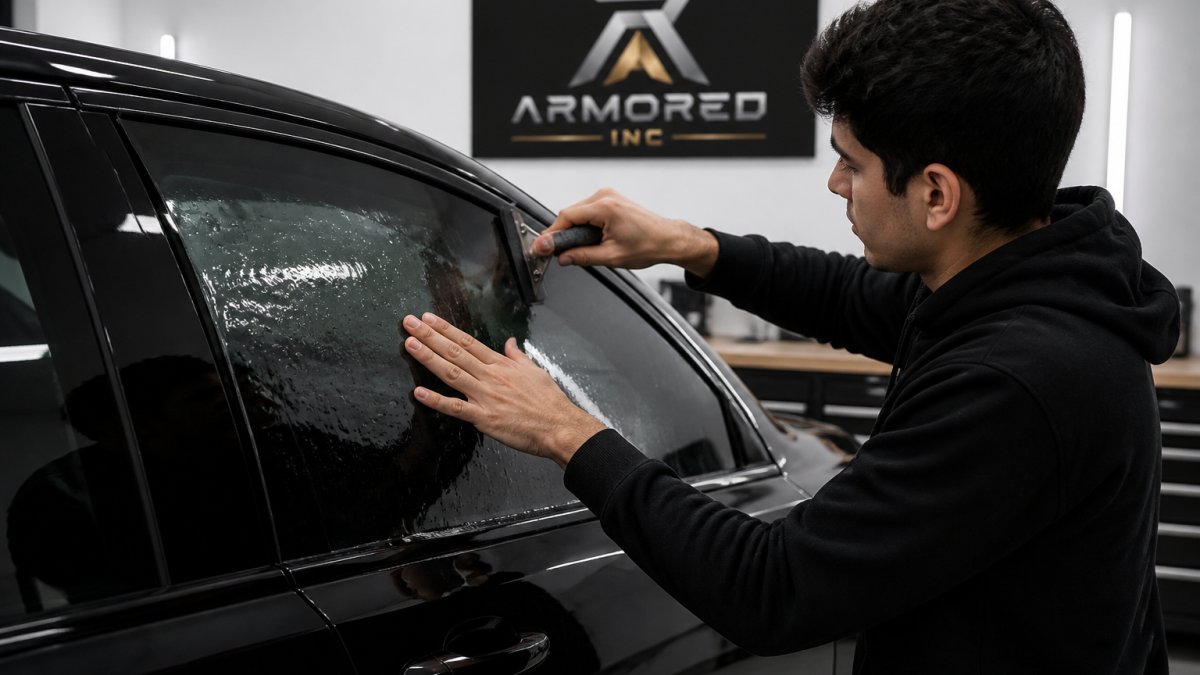
The most common mistake is inadequate squeegee technique. If the technician doesn't apply enough pressure, use consistent strokes, or misses certain areas, air pockets remain trapped and sealed in by the adhesive with no escape pathway.
Improper window preparation is another leading cause. If the glass isn't cleaned thoroughly, debris and dust create barriers between film and glass, leaving air gaps. Lint-free cloths are essential; regular towels leave fibers that cause the same problem.
Rushing the installation process increases trapped air risk. Professional tinting requires patience and precision. Temperature during installation also matters, glass that's too cold reduces adhesive effectiveness, while glass that's too hot can cause the film to set before proper positioning. The ideal installation temperature is 15-25 degrees Celsius.
Quality of Window Tint Film
Lower-quality films are more prone to adhesion problems and bubble formation. Premium films have better adhesive formulations that bond more reliably and create fewer micro-bubbles during curing.
Cheap films often use lower-grade adhesives that don't set uniformly, creating inconsistent contact and small air pockets. Films designed for automotive use are engineered to handle thermal expansion and contraction; inferior films may not flex properly as the vehicle interior heats and cools, leading to bubble formation or delamination.
Expired or improperly stored film can develop adhesive degradation before installation, making bubbles almost inevitable regardless of technique.
Window Tint Curing Time and Environmental Factors
The curing process varies by location, season, and weather conditions, all influencing how long the film takes to fully set and how bubbles evolve.
Extreme Temperatures and Sub-Zero Weather
Ontario winters create unique challenges for window tint curing. Sub-zero temperatures dramatically slow evaporation, what might cure in 2-3 weeks during summer could take 6-8 weeks in winter (nist.gov).
Cold glass is particularly problematic. When tinting is done in freezing conditions, the adhesive struggles to set properly and bubbles are more likely to persist. Extreme heat causes different problems: the film may set too quickly, trapping moisture and air before the solution fully escapes.
Thermal cycling, the repeated heating and cooling as vehicles move between sun and shade, stresses the film and adhesive, especially relevant in Barrie during spring and fall.
Humidity and Moisture During Cure
High humidity slows evaporation because the air is already saturated with moisture. Ontario's climate includes periods of high humidity, particularly during summer and early fall, extending the curing period and increasing visible bubbles initially.
Rain or snow on the vehicle immediately after installation introduces additional moisture that interferes with curing. Most professional installers recommend keeping the vehicle dry for at least 48-72 hours after tinting, extending to a full week in humid conditions.
Interior moisture also matters. Running air conditioning or heating immediately after tinting introduces moisture or temperature changes that disrupt the curing process.
How to Remove Air Bubbles from Car Tint
Not all bubbles require removal. Knowing which ones will disappear on their own versus which need professional attention prevents unnecessary damage to the film.
When Bubbles Disappear on Their Own
Micro-bubbles appearing within the first week are almost always temporary. As moisture evaporates and adhesive fully sets, they vanish without intervention. In warm, dry weather, expect them to clear within 2-3 weeks; in cool or humid conditions, allow 4-8 weeks.
Parking the vehicle in direct sunlight accelerates the process slightly by helping moisture evaporate faster. Larger water pockets often disappear on their own if installation was correct, typically clearing within 4-6 weeks. windshield seal failure.
Manual Removal Techniques
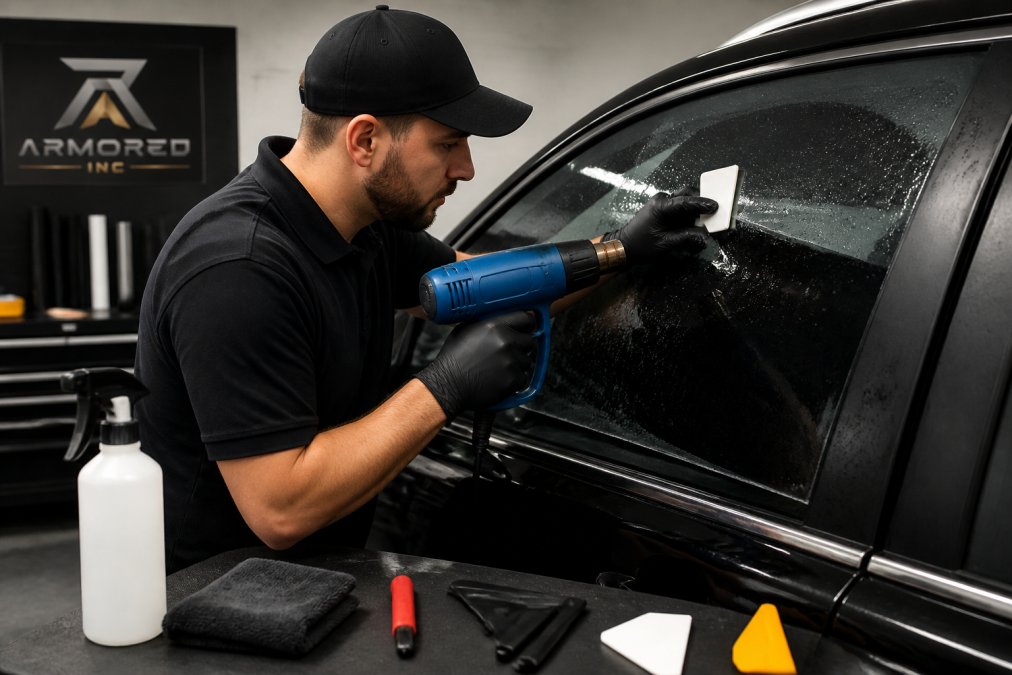
If bubbles persist beyond 8 weeks or obstruct visibility, manual removal becomes necessary. The heat gun method is most common: gentle heat makes the adhesive slightly pliable, allowing you to use a squeegee to press the bubble toward the window edge, releasing trapped air.
Hold the heat gun 15-20 centimetres away and move continuously to avoid overheating (osha.gov). Overheating can damage the film, cause uneven shrinking, or weaken the adhesive.
For smaller bubbles, a needle can puncture the film to release air, a last-resort option that creates a small hole but is often preferable to leaving a visible defect.
When to Return to Your Installer
If bubbles persist after 8-10 weeks or obstruct your view, contact your installer. Most professional tinters offer a warranty covering installation errors. Bring the vehicle during daylight so bubbles are clearly visible. A reputable installer will either remove them or re-tint the window at no charge.
If the installer refuses to address persistent bubbles, that's a red flag. Document the issue with photos in natural light for warranty claims.
Signs of Low-Quality Window Tint Film
Some bubbles and defects point to material problems rather than installation issues.
Film Delamination and Adhesive Failure
Delamination occurs when the film separates from the glass or when protective layers separate from each other, appearing as peeling or lifting at edges. Poor adhesive is the primary cause, low-quality films use adhesives that don't bond reliably over time.
Adhesive failure is often accompanied by bubbling at window edges as air enters from the perimeter. Once delamination starts, it typically accelerates, and professional re-tinting is the only solution.
Persistent Haze and Streaks
Haze or cloudiness that doesn't clear after 6-8 weeks suggests adhesive or film quality issues. Streaks or uneven coloring indicate inconsistent adhesive application or low-quality film. These defects are permanent and won't improve with time or heat.
Is It Normal to Have Bubbles After Installation
Yes, small micro-bubbles immediately after installation are normal and typically disappear within 2-4 weeks in warm conditions or up to 8 weeks in cool or humid weather. Larger, distinct water pockets that are gradually shrinking are also normal and usually clear within 4-6 weeks.
What's not normal: bubbles still prominent after 8 weeks, bubbles obstructing vision, or bubbles growing larger instead of shrinking. These indicate installation errors or material problems requiring professional attention.
Bubbles at window edges are more likely to resolve on their own because moisture can escape there. Bubbles in the middle, surrounded by sealed film, are less likely to disappear without intervention.
Preventing Bubbles: Installation Best Practices
The best solution is prevention through choosing a professional installer who follows proper technique.
Professional Window Preparation and Cleaning
Professional installation begins with meticulous window preparation. The glass must be cleaned thoroughly to remove all dust, debris, oils, and residue. Professional installers use specialized cleaning solutions and lint-free cloths designed for this purpose, cleaning multiple times to ensure complete cleanliness.
The ideal surface temperature for application is 15-25 degrees Celsius. If the window is very cold, it's warmed slightly to improve adhesive bonding; if extremely hot, it's allowed to cool.
Proper Squeegee Technique and Lint-Free Application
The squeegee is the most critical tool. Proper technique involves applying firm, consistent pressure in overlapping strokes from the center outward toward edges, pushing out air and solution systematically. Professional technicians use multiple passes from different angles to ensure complete contact.
The squeegee must be clean and free of debris. Lint-free cloths are used throughout to wipe excess solution and check for trapped air.
Post-Installation Care and Warranty Coverage
After installation, keep the vehicle in stable conditions for at least 48-72 hours. Avoid washing windows, rolling them down, or exposing them to extreme temperature changes. Most professional installers offer a 30-90 day warranty covering bubbles and defects from installation errors.
Armored Inc. in Barrie provides professional window tinting with attention to these best practices. Proper preparation, technique, and post-installation care ensure minimal bubbles and quick resolution of any that appear. If persistent bubbles develop after the curing period, contact your installer, a professional shop stands behind their work and will correct installation errors at no charge.
Window tint bubbles are frustrating but mostly preventable, with many resolving on their own. Understanding whether you're looking at temporary micro-bubbles or defects indicating installation or material problems is key. Choosing a professional installer in Barrie who follows proper technique and stands behind their work with a solid warranty eliminates most bubble concerns. If bubbles persist beyond the normal curing window, a reputable installer will correct them. Contact Armored Inc. for professional window tinting that minimizes bubbles and delivers the privacy and UV protection you're looking for.
Frequently Asked Questions
Q: Is it normal for window tint to have bubbles immediately after installation?
A: Yes. Small micro-bubbles and moisture pockets are common immediately after installation because the adhesive requires time to cure. During the curing process, moisture evaporation occurs as the adhesive sets, which can create temporary bubbles. These typically disappear within 3 to 7 days as the film bonds fully to the glass. However, if bubbles persist beyond two weeks or appear large and irregular, the installation may have had issues with window preparation or squeegee technique.
Q: How long does it take for moisture bubbles in window tint to disappear?
A: Moisture bubbles generally disappear within 3 to 7 days during normal conditions, though the complete curing process can extend 2 to 4 weeks depending on temperature and humidity. In colder weather or high-humidity environments, curing takes longer because moisture evaporation slows. Extreme temperatures, particularly sub-zero weather common in winter, can significantly extend curing time. Avoiding window operation and direct heat exposure during the first week accelerates the process.
Q: What are signs of low-quality window tint film?
A: Low-quality tint film exhibits persistent haze, visible streaks that don't fade, rapid film delamination (peeling edges), and adhesive failure where the film separates from glass weeks or months after installation. Bubbles that remain large and numerous after two weeks suggest either poor film quality or installation imperfections. Inferior adhesives may fail under UV exposure and thermal expansion, causing the film to lose clarity and structural integrity over time.
Q: Can I pop window tint bubbles with a needle?
A: Avoid poking bubbles with a needle or sharp object, as this risks puncturing the film and creating permanent damage. For small moisture bubbles during the curing process, allow time for natural evaporation. If bubbles persist after two weeks, use a heat gun on low setting to gently warm the area while carefully pressing with a lint-free cloth and squeegee. For adhesive failure or large persistent bubbles, contact your installer for professional correction rather than attempting DIY repair.
This article was written using GrandRanker